BRIAN’S GUIDE TO SIMPLE BRIDGE BUILDING FOR HAM-FISTED BODGERSOn the MDLR, there was a bridge. Only a small under-track one - think cattle creep or small stream size and you’ve got the general idea. It had (like most of the rest of the infrastructure) rotted away to a fairly great extent, so a re-build was called for. This was how I did it. INGREDIENTS 1 length 12 mm X 12 mm wood strip (like what you use for battening your track) 1 length 12 mm X 4.5 mm wood strip (like what you use for the extra-long sleepers to attach point levers to) Tacks (like what you use to attach sleepers to battens) Wood preservative of your choice - the MDLR (at the time this was first written) still had stocks of Ye Olde Nut Brown Creosote. All the above are freely available at your local DIY shed. 1 mm diameter florist’s wire. This is soft iron wire which florists and flower arrangers wrap around the stems of flowers to stop ‘em drooping. Try your local florists or flower arranging evening class. Enough track (sleepers, rail and chairs) to go across the gap. As you will see from the pictures, the abutments are very simple - two bricks (actually blue brick paviors in this case) whose finished height is “batten depth below final track level”. 1) Cut 4 pieces of 12 X 12 the length of your bridge. These will form the deck beams. 2) Use 1 sleeper at either end of two of these 12 X 12's to space them a sleeper’s width apart - drill & fix with tacks. If your bridge is a long one, you may wish to use more sleepers. 3) Cut two more bits of 12 X 12 the width of your formation and fix across the ends of the deck beams - these will retain the ballast. 4) Fix the other two deck beams within the width of the sleepers. 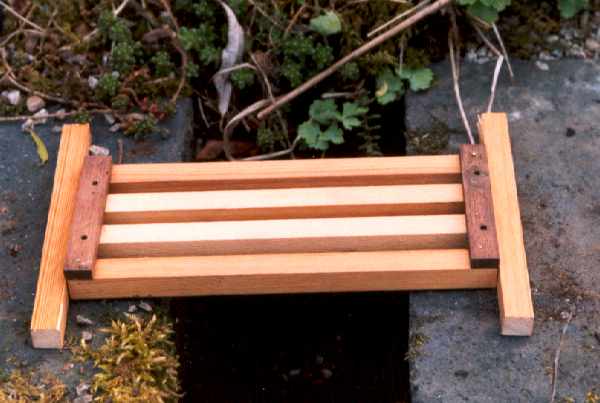
If you wanted to, you could leave things at that - treat with wood preservative of choice and lay track across. It would work (and did on the MDLR for a good number of years). However, we’re going for something a little grander. 5) Cut as many lengths of 12 X 4.5 as you feel you need to the width of your finished bridge. Think 4 planks of 12 X 4.5 running the length of the bridge either side outside the sleepers. Pin these to the top of the deck beams. These will support the planks for the walkways. 6) Cut 8 planks of 12 X 4.5 to run the length of the bridge. The outermost plank will carry a length of 12 X 12 the full length of the bridge underneath the cross-pieces - this will be what we’ll fix the handrails to. Pin the planks to the crosspieces - pin through these into the 12 X 12 on the outside edges. 7) If (like me) you haven’t been too concerned about the length of the planks (so long as they overlap the ends they’ll be OK), take your trisquare, draw a pencil line across all the planks at either end of the bridge and cut the ends off using a fine tenon saw. If you do this neatly, nobody will ever know that you didn’t measure them all accurately and took great care to get all the ends level! 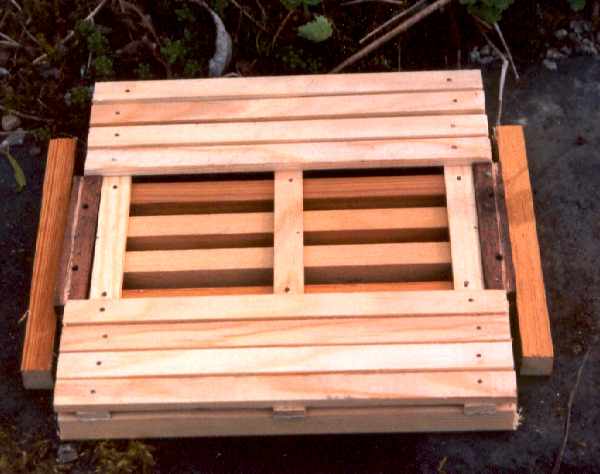
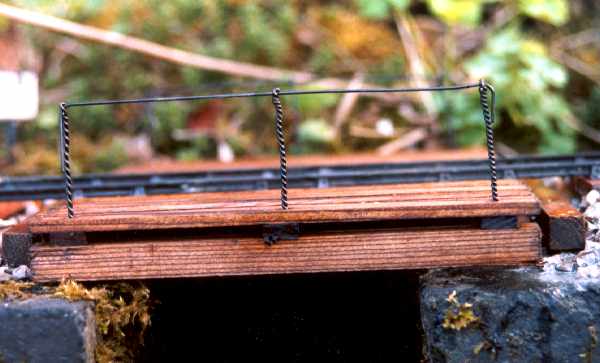
Now, we’re going to make the handrails. 8) Take a length of florist’s wire, a bit more than twice as long as the handrail is going to be high. Bend in the middle and clamp the two ends in the chuck of a battery or hand drill. Grip the bend firmly in a pair of pliers and operate the drill. The florist’s wire will neatly twist around itself, producing a "barleysugar" effect, with a loop at the top. A small pair of pliers (or length of small-diameter rod) will create a small loop (small enough to thread another piece of wire through to make the handrail). If you are REALLY clever, you might be able to put in a second loop half way up (or down, depending on your viewpoint). Make as many of these as you have crosspieces - don’t worry if you wreck a few - you’ll soon get the hang of it.
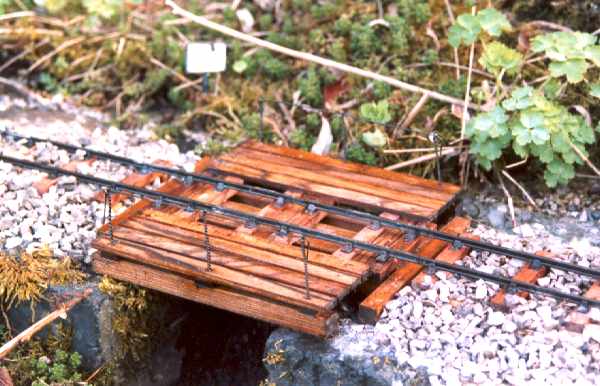
9) Cut stanchions to final length, drill to suit through crosspieces into outside 12 X 12, force fit stanchions, thread a length of wire through the loops (not as easy as it might sound, as some loops may not be dead vertical or in line) and bend over at the ends. 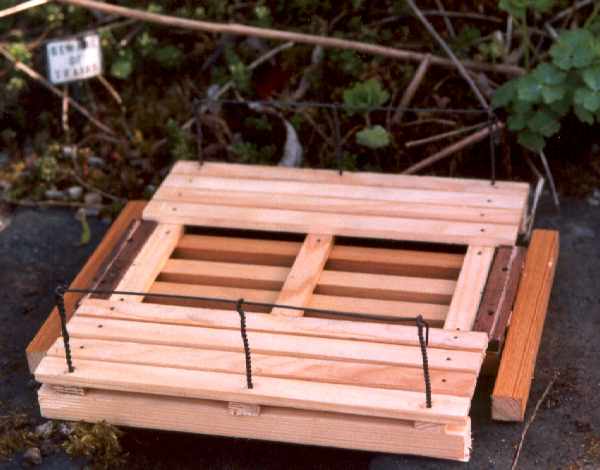
10) Treat with wood preservative of your choice, set in place, lay track (don’t forget to leave “spare” chairs to fasten to sleepers built into the bridge), ballast, stand back, admire, take photos all the way through and write it up for SMT!
|