|
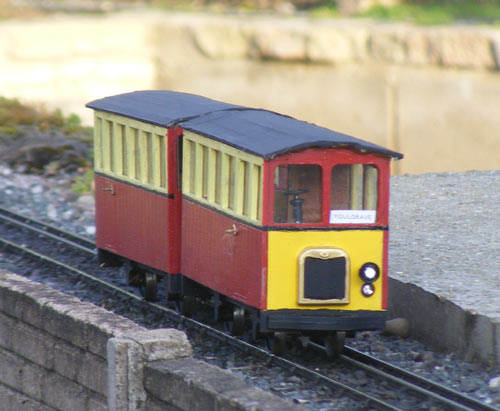
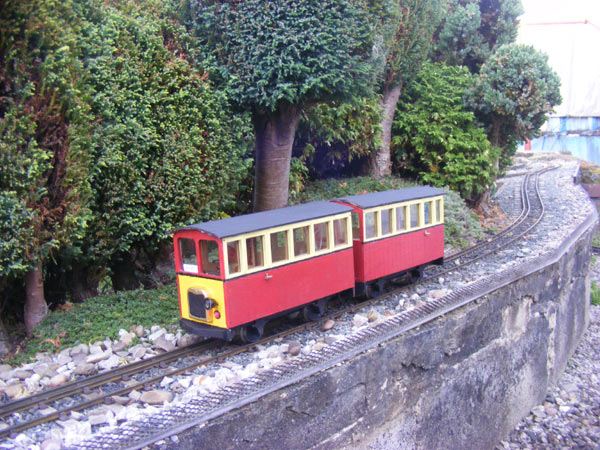
18A & B are a pair of IP Engineering Mandie railcars running back-to-back.
17th July 2010
Started work today. Not a serious amount of physical work (apart from detaching the main parts of each body and sanding their edges – laser-cut edges seem to soak up a LOT of paint) but a lot of planning and decision making. As I've got a pair to play with, there will be some modifications from what Mr IP Engineering lays down in his instructions. Body sides are to be swapped between the kits, so there's an entrance in each corner of each car, rather than both at one end. The entrance doors will have droplight windows with straps to open them. As the rear entrances will become emergency doors between the halves of the twin set, we need some way for the passengers to get on and off! The motor will be installed at the opposite end to that suggested as there's to be a half-width cab (at the left hand side as you face the end) with a Driver's seat. The wiring runs will also be shorter. The sides are to be double skinned with an inner skin of 0.8mm ply with the glazing in between the two skins – the ends won't need it as the radiator end has the Driver's desk which will hide the bottom edge of the glazing and you won't be able to see the inner ends very well. The motors are going to need boxes making to fit over them – the top will provide extra seating. All seats will be covered in leatherette, and there'll be a leatherette blind behind the Driver's seat to stop light from the saloon from impeding his vision. The unit will be fully lit – directional lighting - headlamp and tail lamp at each end – and interior lights. I have a number of spare roof ribs from other kits which just happen to be the same radius as the roof of this kit, so they will be used to support the lighting bar down each car. I've decided on the colour scheme – the interior will be stained with wood stain, whilst the exterior will be County Donegal – style red and cream, with the inner ends of the unit all red and the outer ends cream and Warning Panel Yellow – this is, after all, a modern piece of traction!
18th July
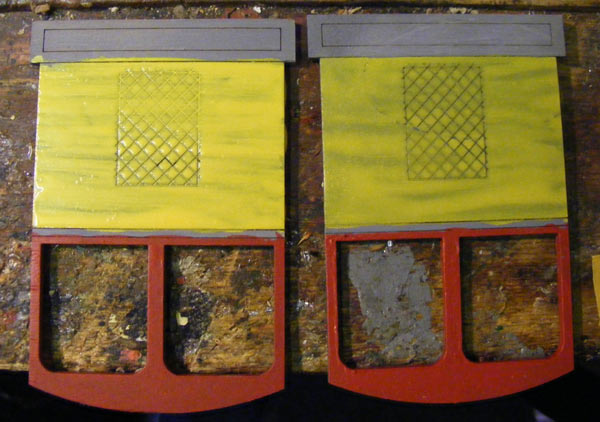
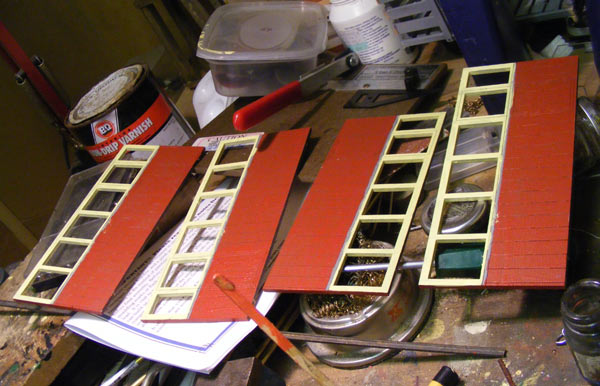
Had a frustrating time trying to buy a SMALL sheet of acrylic glazing sheet – none of the local DIY sheds had got any – have to try Derby in the week! I got on with the painting of the body panels – grey primer, acrylic red and enamel cream and Warning Panel Yellow. The latter was a REAL disappointment – it's very “thin” and even two coats aren't going to be enough!
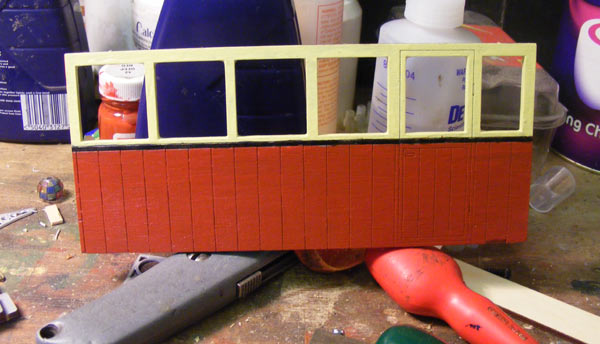
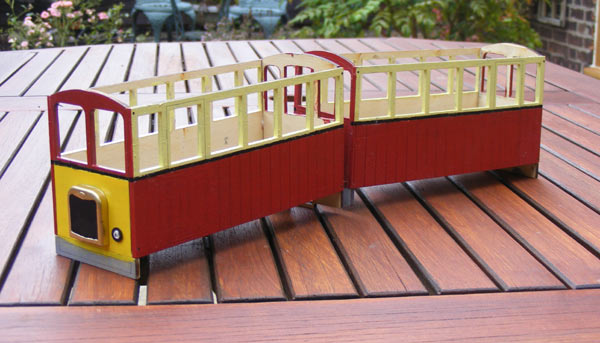
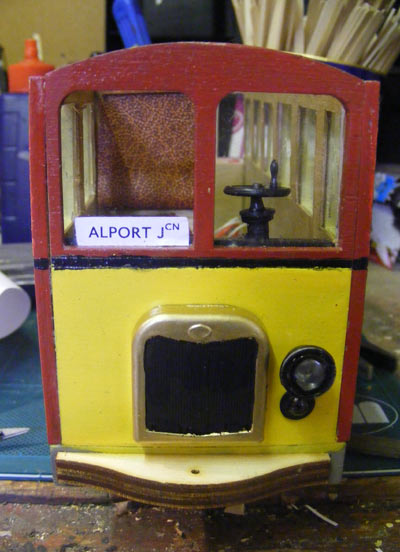
As you can see, the livery's got modified already! I decided there wouldn't be enough contrast between cream upper ends and the yellow warning panels, so the upper ends are now red!
19th July A frustrating day's shopping, this. The MDLR's Stores Dept was right out of glazing material and I needed to buy some. Investigations at my two local B&Q stores yesterday proved fruitless, so at lunch I went to the nearest store in Derby. “Where do you keep the acrylic glazing sheets?” I asked as I walked in. “At our other store in Derby” was the reply. It was too far to go in my lunch hour, so when I got home I rang the store. “We're a Warehouse – we don't sell single sheets. Would you like 20?” RETRTYGH*&&^%£!!! I then looked up Wickes on the internet, found what I wanted and rang my local store. “We've got 14 in stock, sir”. RESULT!! A quick trip back into Derby (the store's about 5 minutes from where I work but I wouldn't use the works van in the day – oh, no!) resulted in the sheet being purchased and put away – I've enough glazing for YEARS! Actual progress has been confined to more Warning Panel Yellow on the outer ends, plus spraying the two Cambrian Mouldings radiators with Plastic Primer, prior to prior to spraying with Plasticote Brass. 21st July It's been a bit too hot to spend much time in the workshop of an evening (apart from yet more Warning Panel Yellow on the ends) but tonight I finally went into the workshop at around 2300, having cut what is laughingly referred to as the lawn at MDLR Towers. Yet another coat of Warning Panel Yellow went on, as did a coat of semi-gloss black on the radiator centre. I decided to grasp the nettle of the black band 'twixt red and cream, got my finest paint brush out and had a go. It worked! I've got a little touching up of red to do, and the laser-cut windows need another coat of cream: I think the laser cutting “crisps” the plywood and makes it absorb paint much more readily, but fairly soon I can see varnish being applied!
The Final livery 27th July More Warning Panel Yellow……………. (though I think we're about there), more red paint (the last coat) and more black on the radiators. The cream needs doing again but I wouldn't do that whilst the red was wet. I did, however, start on sorting out the non-interior-lighting LEDs. I've got a pair of awesomely bright clear red LED's which will make the tail lights – I've also got the black bezels that they go into (and lock as you push them home!) but I've only got one small white clear one for the headlights, so the one I've got, plus a battery pack, have now been stowed in a plastic bag, ready for a visit to my local electronics shop – Messrs Potts, on Babington Lane in Derby . 28th July Off work – I've got a left knee that's swollen up like a balloon and I can barely put weight on it, but I can sit down..... I finally got all the exterior painting done, so now the sides and ends are ready for varnish. Looked out the headlights and got the interiors painted silver, ready to fit the LEDs. After a lot of very gentle drilling and opening out of holes 0.5mm at a time (to 6.5mm, if you really MUST know) I installed the bezels for the rear lamps and pushed the LEDs in from the back so these are ready for wiring up.
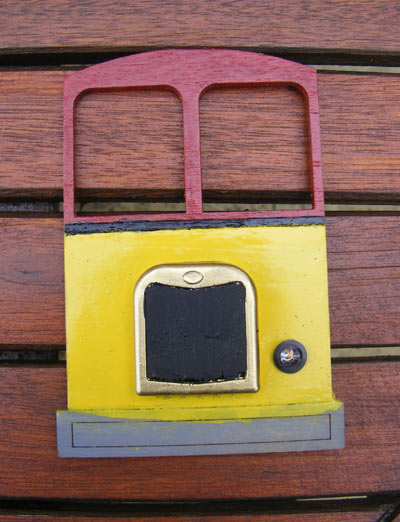
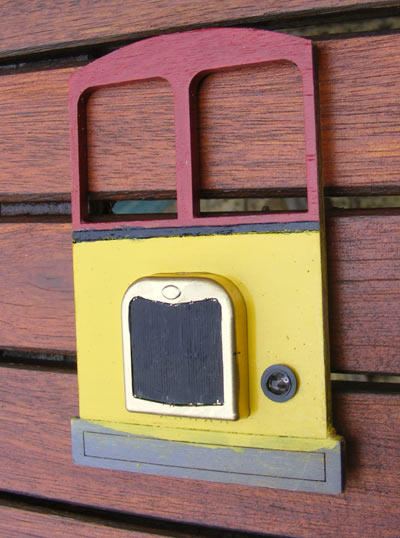
An End Finished.........
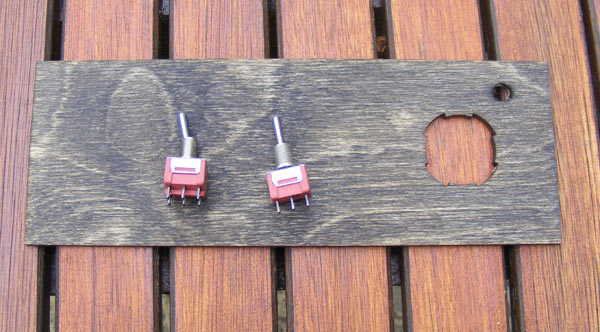
........ with the Cambrian Mouldings radiator in place. 29th July "Facebook" Brian is a fan of Acrylic Varnish - Become a fan "/Facebook" I actually varnished all the body panels last thing last night, so this morning, there they were, all nice and glossy and ready to assemble. Before that, I got out the two floors and drilled holes in them for the switches (6.5 mm again) – one single pole ON/OFF/ON switch for the directional lights (interior lights will work off the battery box switch) and one double-pole ditto for traction. I'm going to have to remember to switch them both in operation!
The stained floor with hole for switch and switches!
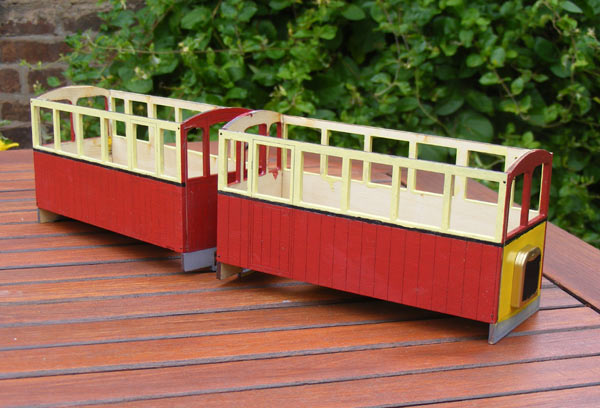
NOW we're cooking with gas...........
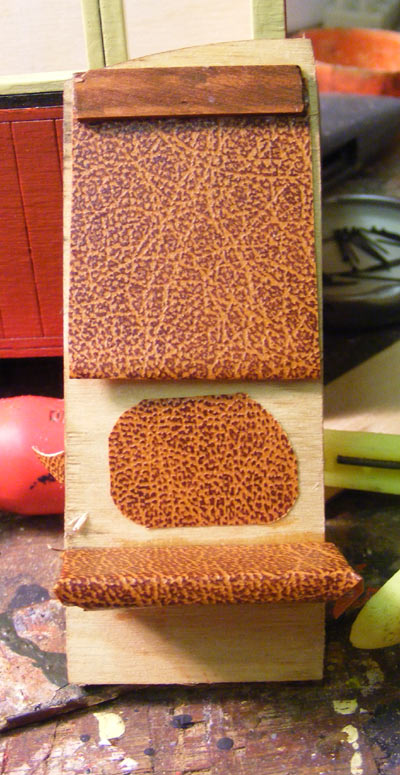
Once the cars were together, a number of anomalies reared their ugly little heads. On one side, both doors will be at the centre of the unit: on the other, they'll be at the ends. This means that on one side of the unit, the name and number plates will be at the extreme ends – on the other side, they'll be at the inner ends of each car, more-or-less next to each other. One end of the unit will drive from the left – the other end will drive from the right. Because I've opted for a half-width cab (I've cut down the full-width partitions, stained them and stained a piece of 1/8” square to act as a reinforcement on the cut edge) the seating arrangements have had to be altered. On the non-cab side I'll be able to use the full-length seat Uncle Ivan so thoughtfully supplies, but behind the cab there'll be a half-length seat behind the cab and a small seat behind the door. This means that there's enough seating material left to make a Drivers' seat. Most of the seats have been covered in the self-adhesive brown Rexine I bought for the job, which doesn't seem to be as sticky as the green velour I bought for the Buffet Car, which means I've had to overlap it more. Second Spasm – Fun With Self-Adhesive Rexine Having got the previous jobs written up, I went back to the workshop and finished covering the seats. I also made up the blinds for the back of the Driver's cabs – an idea pinched from old buses and first-generation DMU's. After fitting these (and representations of the boxes they were supposed to roll up into) I fitted the Driver's seats. Next job? Lining panels!
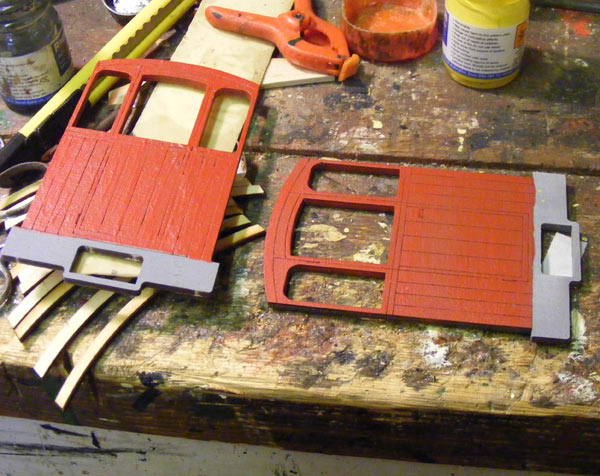
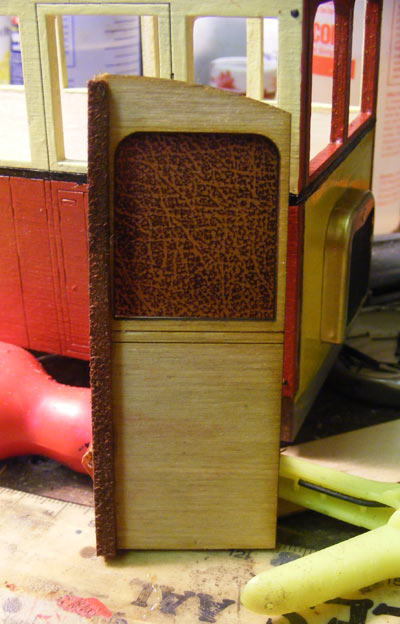
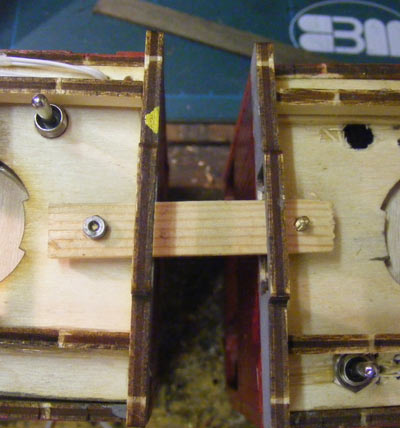
A cab partition from the saloon side...............
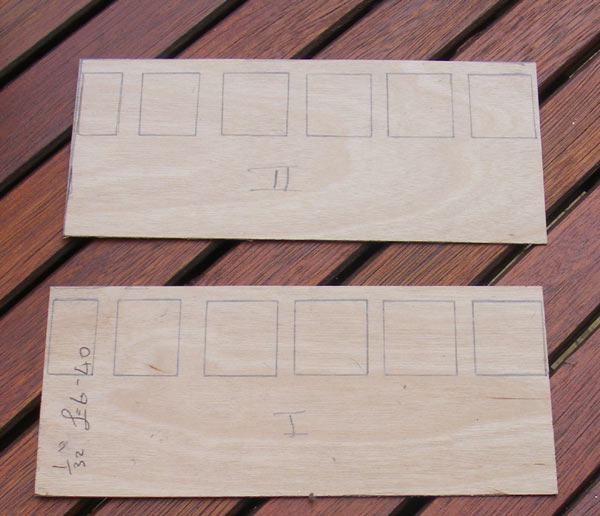
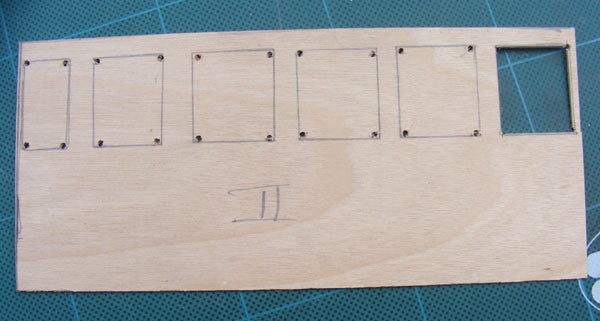
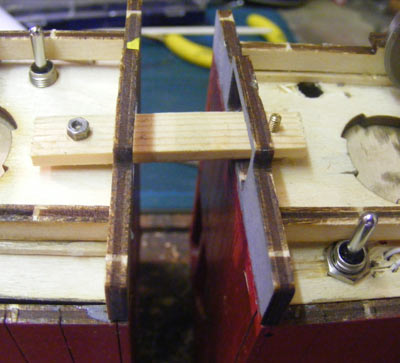
................ and from the cab side! 31st July It's odd how ideas suddenly occur……………. I've been debating about the motors Uncle Ivan supplies for the railbus (and other kits). His method of “laser a hole in the floor which the motor pushes into” is simple and works well, but in the case of the railbus you end up with a whacking great motor sticking up in the interior somewhere, which is one reason why it got swopped from the driving end to the inner end of each car. Even there, there would have been little or no room between the seats for (imaginary) passengers to get round it (or around the wooden case I was going to build around it).I was mulling all of this over in my mind just after I woke up, when I had an “Eureka!” moment. I suddenly remembered that you can get flat (well, flattish) 3 volt motors – Brian Clarke often used them in Saltford Models kits – and they're not expensive! One of these could sit under the floor and be glued into position: perhaps not flat – there might need to be some sort of shim to tilt the motor so the gears mesh nicely, or the motor might need to be packed with some thin ply to achieve the same effect, but it shouldn't be too difficult to end up with a motor totally out of the body, and I have the skills to be able to do it! Having got back from Derby with LEDs for headlights and interior lighting, I dug out my Squires catalogue and found the motors, which are going to cost me a bank-account-breaking SEVENTY-FIVE PENCE EACH! A call to them got them whizzing on their way, so early next week I'll be able to look at this in rather more detail. Meantime, there's still plenty to do………….. Second Spasm…………….. …………… which started out by making the internal lining panels for the sides of each railcar, from 1/32” ply I keep for the job. I've learnt from doing the Buffet Car………. Each panel is firstly cut to fit closely inside each side. Then, with a SHARP pencil I draw around each window and drill a hole inside each corner. These (in theory, at least) act as “stoppers” and stop the knife carrying on and slicing through the fragile window pillars. This doesn't always work: certainly not at the ends, where the internal pillars would only be about 1mm thick. All the cutting out is done with a Stanley knife with a new, sharp, blade: when I did the Buffet Car I used a scalpel and apart from damn near slicing my fingers to pieces, the pressure required on a slim handle to make a cut was ENORMOUS!
Sides drawn out................
................ holes drilled and cutting started...........
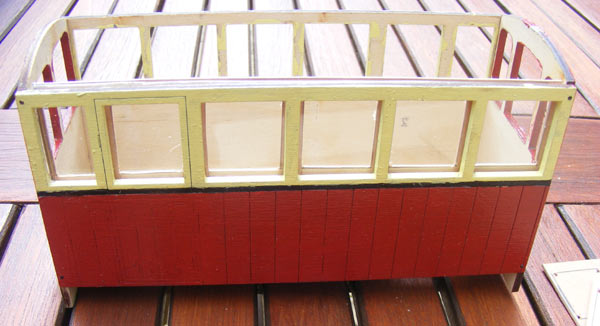
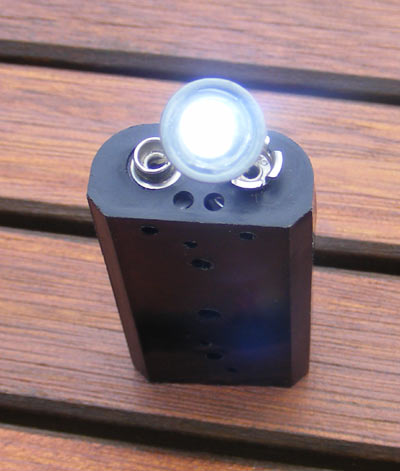
................ and fitting in place with the glazing! Once they were done, I attempted to cut out all the glazing. Unfortunately, the Wickes Acrylic Glass I bought for the job acts just like glass, and cracked and shattered where I didn't want it to. Fortunately, it's a big sheet……………. I also added the bars that the glazing will sit on, to stop it sliding down and disappearing between the two layers of ply, and got the sides stained Light Oak – I'm going to glue all in place when I've finished writing this. I've also assembled and painted the two front headlights from Cambrian Mouldings, having first drilled two small holes in the back of each one and epoxied a 3mm white LED in each one. They work a treat!
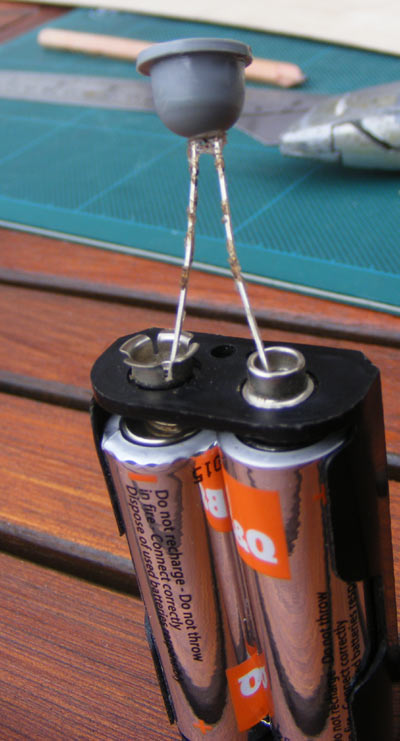
The headlamp on test - in bright sunlight, let me add!
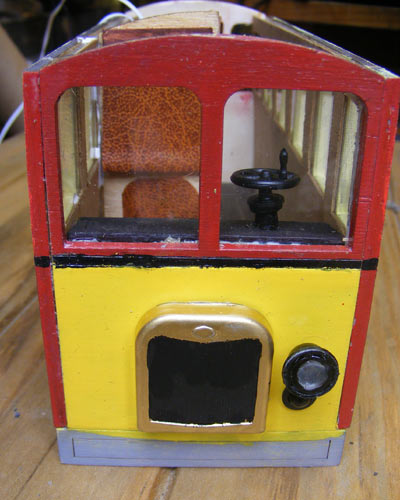
This shows the depth of the headlight. 1st August Only a small amount of progress today, and only on one car. The end glazing was fitted on the Driver's end of the car, the control desk was cut down (because now it needs to be smaller, because of the added glazing and lining) and stained and painted. The headlight was fitted and both headlight and tail lamp wired and tested (because they're going to be boxed in by the control desk). I broke the Cambrian Mouldings brake handles out of store and assembled and painted them, and drilled out the top of the control desk 5.5 mm to take the shaft of the brake column. Finally, the control desk was fixed in place and the half-bulkhead which creates the Driver's cab was glued in place. I was going to fit the seats, but I'm increasingly unhappy with the nonstickyness of the (alleged) self-adhesive rexine. It doesn't appear to like to stick to wood, so it's going to have to be secured in place with Evo-stik before the seats can be fitted.
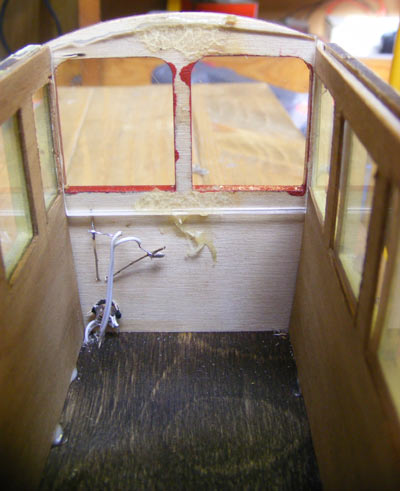
Lights wired and glazing fitted...........
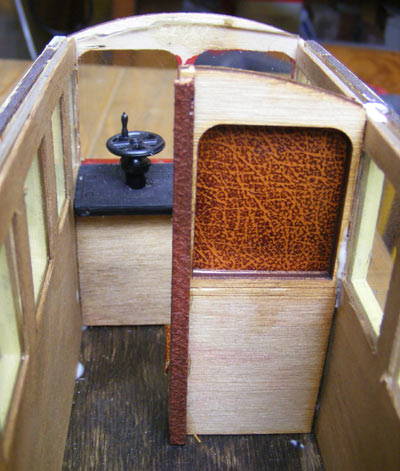
............ control desk and half bulkhead fitted...........
............ and the view from the front end.
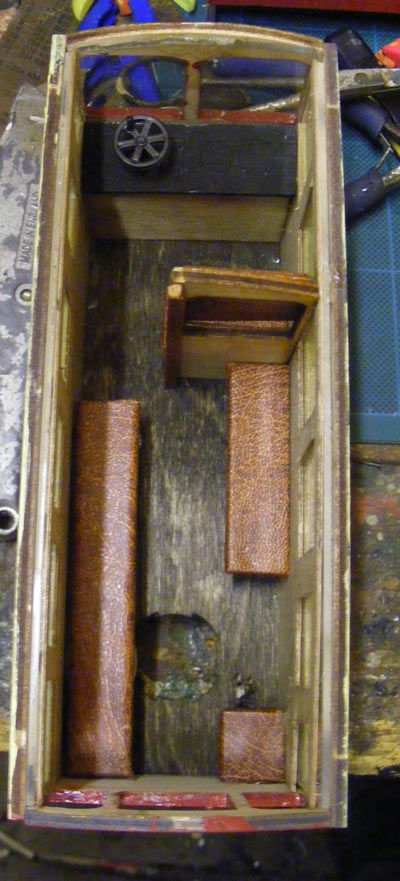
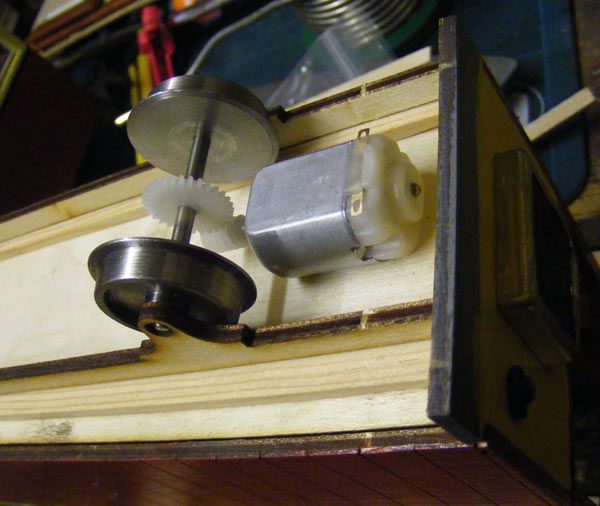
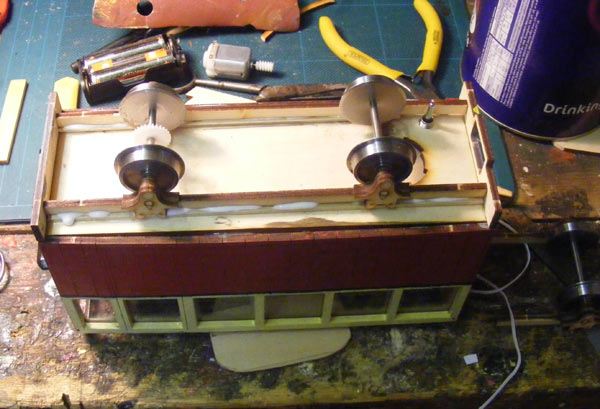
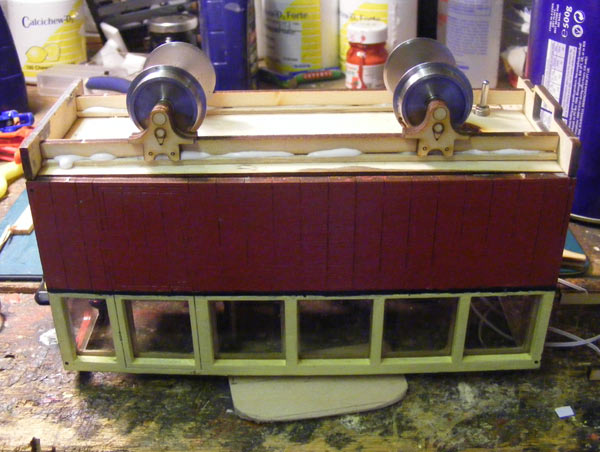
Finally, a view with the seats fitted (tho' one's not stuck down yet - access to switch). 4th August The new motors arrived from Squires today and though I'd been out all day for a non-railway function and was fairly knackered, I HAD to see how they were going to fit. Having fitted the gear to the axle and the worm to the motor, I offered everything up, roughly. To start with, the motor would have needed to be cocked up on end quite a bit to get the worm and the gear to mesh – in fact, the motor would have ended up perilously close to rail level. Then, I had an inspiration. Instead of tilting the motor to reach the gear, why not move the gear? Nothing could be simpler – a strip of wood between solebar and floor would make the cars ride a fraction higher, but will allow the motor to sit flat – in fact it may need slight packing with thin ply "Seemples!"
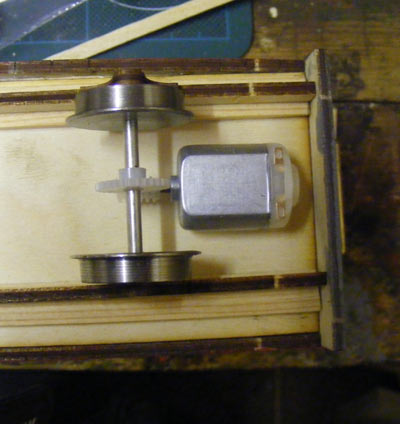
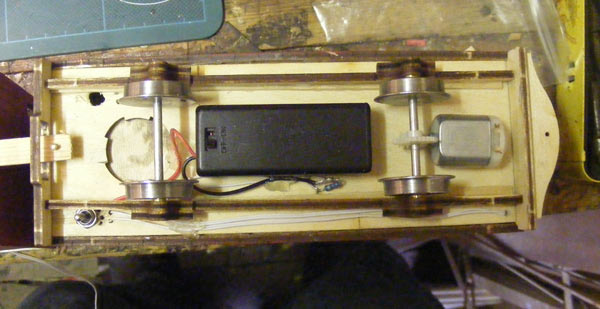
The gears meshing perfectly.............
............ and the motor sitting flat. 15th August“The Wheels on the (Rail) Bus go Round & Round…….” In which a coupling is achieved, cherished ideas are abandoned, the perils of kit-bashing rear their ugly head and the MDLR has a Terence Cuneo Moment. An early start today, after No 2 Son's birthday bash last night. The extra lengths of wood on which the solebars will sit were sourced and fitted – not without difficulties, as wiring and switches tended to get in the way. Whilst the glue on these was going off, the second set of solebars, bearings and axleboxes got assembled, as did the second driving axle. Once this was done, the MDLR had a Terence Cuneo Moment as “A Railbus is Wheeled” – all went together well.
I've had to discard a couple of things that I was going to add to the set. I'd bought a set of horns (sheep and trespassers on the track for the warning of) but was disappointed by the results when they were assembled – the “trumpets” at the business end did not flare as well as I would have liked them to, and as they were to have been mounted in the ends, rather than on the roof, I didn't consider them to be good enough, so out they went. I'd also wanted to add destination boxes and displays and had already made up a “destination blind” with a few names on (once I'd remembered how to do white-on-black lettering on the computer) but found there wouldn't have been room to incorporate these as I would have wanted. The fall-back position is to try Underground-style black on white destination plates in the driving end windows of each car – I've just printed these off and will try them when I go back to the workshop. (a few minutes later) They work – or at least they WILL work when I succeed in cutting them out neat and straight – thank goodness they're the cheapest component of the whole build!
I've also just fitted the “bumpers” which pass for buffer/couplings on the EeZee range, having glued the two layers of ply together earlier in the day. Here, another Peril of Kitbashing raised its head – I can't put a coupling hook in either end because it fouls the new radiators which are thicker than the ply ones Uncle Ivan supplies! Never mind: they were never going to haul anything, anyway!
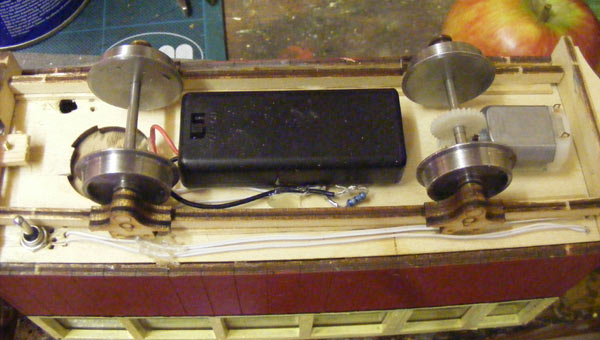
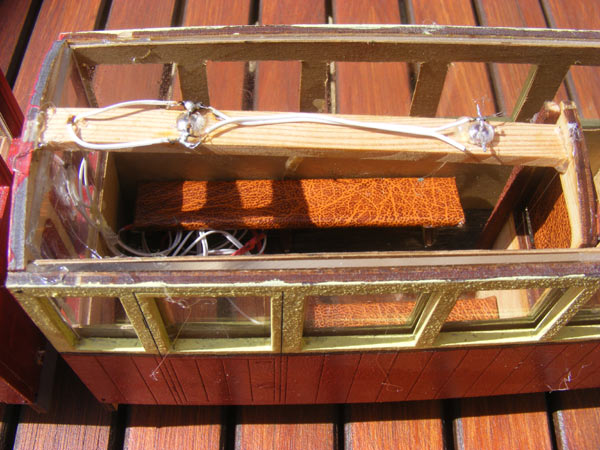
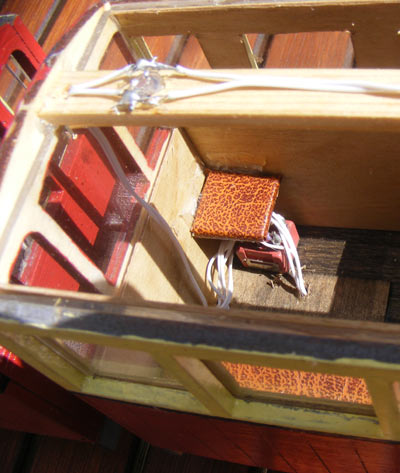
The motors glued in place - notice the wiring (and theres's more to come!) Postscript: I've just been out to the workshop and put a battery across each motor. They both worked OK after a little "persuasion" to start rotating, but the wheels went round at one hell of a rate: I get the feeling that the run from Youlgrave to Alport Junction may just be a quick one! G'night! 16th August This morning I had a thought.................... If I run the batteries in parallel, instead of series, I should get a slower speed with a bit more OMPH - I'll only be using dry batteries, so the dire warnings about running rechargeables in parallel won't apply.......... I'll try it tomorrow night............. 21st AugustToday started yesterday, when I called into Potts to pick up some heatshrink to put round all the wires which pass between the two cars. Shame I didn't pick up a couple of battery boxes, too…………. Today started (after another trip to Derby for battery boxes – the parking cost more than the boxes) with making up and installing the traction wiring. This was DEAD easy, because the switch which is the heart of the whole installation was out on the bench, so attaching and soldering all the wiring to it was an absolute cinch. I DO wish I'd done the lighting the same way………… In due course, the switch was thrown and one motor operated in the right direction. THEN I tested and set the second motor's connection, so both motors and sets of wheels went round in the SAME direction – most important, this! I needed to “tune” the motors by moving them slightly – the Evostick the motors were fixed down with let me do this. Turns out the gears were a LITTLE too tight and binding – twisting the motors slightly altered things from “bound solid” and making the usual grinding noises I associate with IP Engineering gears to silky smooth and almost silent! After this, the wiring was all secured in place and I started in on the lighting. Now both cars are permanently connected together by the wiring for lighting and traction, so life's become a little more challenging. Also, the lighting switch has been fitted, so had to be removed to attach the rest of the wiring to it. At the same time, I had to add an unswitched supply (apart from the switch on the battery box) for the saloon lighting, which is obviously not direction dependent. The wiring and lights in the “T” car were completed, as were the positive connections for the head and tail lamps, but when a wire snapped off just after I'd re-fitted the lighting switch I decided to take a break. 2nd Spasm………….. ………… and then when I tried to re-solder the wire, the damn switch disintegrated! At this point, I decided that a mare's nest of wires was preferable to much more swearing and cussin', so I lengthened all the wires, soldered the switch up OUTSIDE the body and tucked as much of the wiring as I could under the seat. The traction end looks MUCH neater…………. I then had FOUR goes at making the strip of wood the internal lighting is fixed to – the wood WOULD split when I tried to drill the holes for the LEDs, but eventually it was done, fixed in position and the wiring completed. Huge sighs of relief all round! They may get taken out to Ian Shields's line tomorrow – pictures then!
The absolute mare's nest of wiring in the "L" Car...........
................ contrasts with the nice neat installation in the "T" Car!
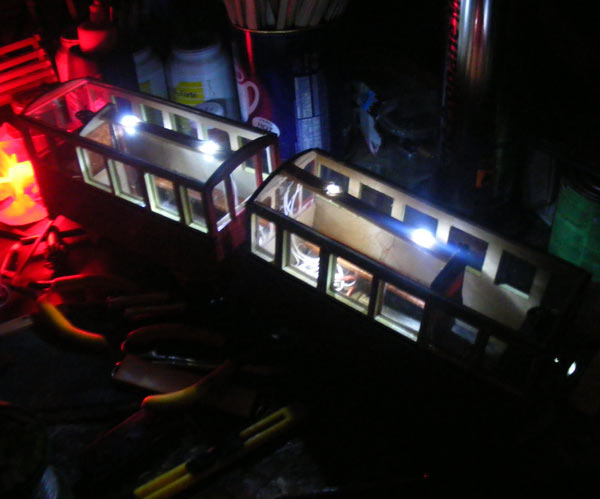
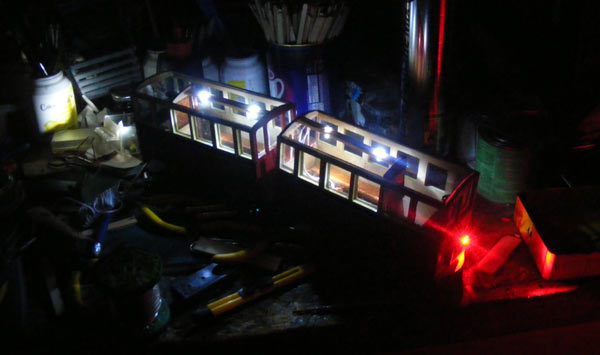
Still, at least the lights work.................
......... very well! 22nd August They DIDN'T get taken to Ian Shields's……………… I put them on the track this morning for a test run – the words “rice pudding” and “Couldn't pull the skin off a” immediately sprang to mind! One wheelset tended to “unmesh” rather too easily and the other one wasn't capable of moving the whole set, so it'll be back to 3 volts PDQ! This won't be difficult – all the relevant connections are under the car! 26th August Got the new battery box fitted and wired in – the wheels now go round rather better! One motor needed a little more “tuning” but this was soon sorted with a dose of glue and a small wedge-shaped piece of wood under one end of it. Trouble is, this particular axle seems to have a little “end float” (in other words, it moves rather more than it should) with the result that it can drop out of mesh. I'm not too sure how to cure this, other than by removing and re-fixing the solebar………. 27th August Painted all the underside in acrylic black tonight – an absolute SWINE of a job, given that everything else is already painted. How I WISH I could have spray painted it! 29th August Fitted the roofs today – at least I started to…………….. they're made up from strips of wood, stained alternately pine and mahogany as is The MDLR Way. I'd got some in stock which just happened to be twice the length of one railbus roof, so it was a simple enough matter to cut these down to size, tape 'em together and fix to the body using hot glue. At least, you'd think it would be…………. I got one on upside down (with the tape inside) so tried to remove it, using a very sharp knife. Result: one trip to A&E with a neat, deep 1½” incision in my right arm – fortunately stitches were not required, but it's a salutary reminder of the dangerous tools we use. 30th August Back to the workshop to finish off the roofs – fixed in place, covered in tissue and left to dry. 2nd (and final) spasm…………. The final three jobs were to paint the roof, cut out and fit the “YOULGRAVE” destination board – third (or was it fourth) time lucky? and drill the holes and fit the door handles. By this time, it was too dark to take pictures or give them a run – a joy for tomorrow! 7th September There was something not right with the interior lighting, and one of the motors STILL wasn't meshing right, so it was CAREFULLY off with the roofs, find the two soldered joints that were touching each other, insulate them with hot glue gun glue (wonderful stuff!), re-fit the motor that wasn't meshing correctly and load up for……………. 8th September …………… the first test run at Butterley! The pair performed quite well, but ran out of battery – I suspect that Agnes, Perdita and endurance aren't going to go together! Also, cheapo batteries are absolutely USELESS! Nevertheless, it's nice to see the project come to an end, and they'll be going out to an Open Day at the weekend!
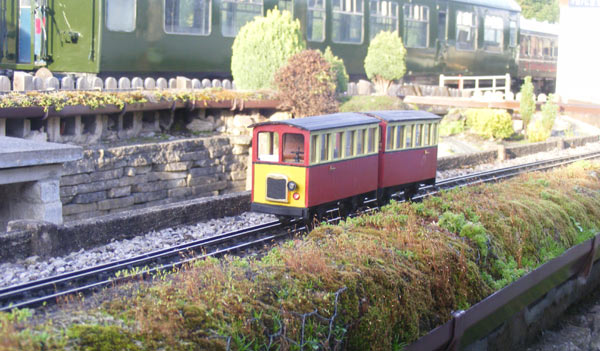
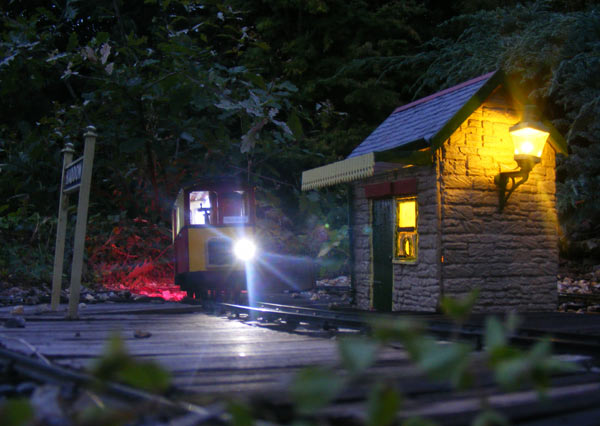
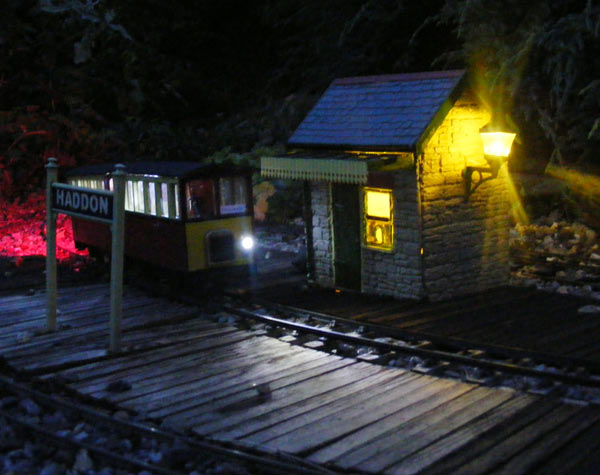
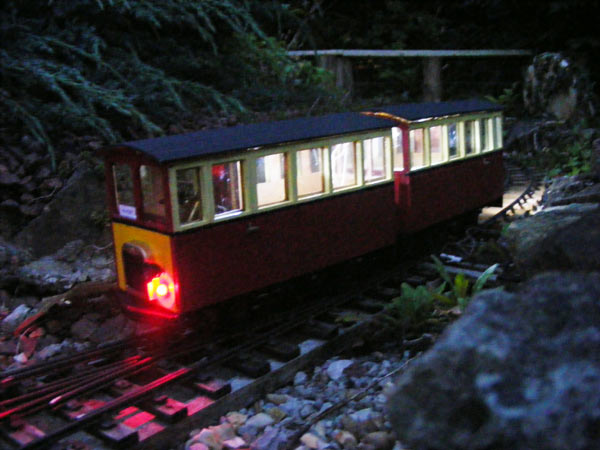
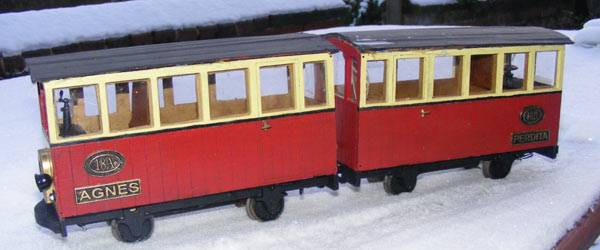
At Haddon station, Agnes & Perdita arrive on an evening train.....................
pause.............
............. then set off for Alport Junction
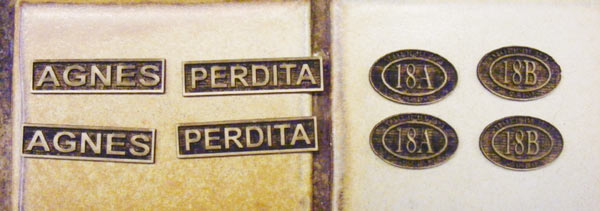
Just when you thought we were done........ Zach Bond kindly agreed to laser some name and number plates. These arrived yesterday and here they are in their raw state.
Once they were sprayed in primer, you could see the very fine detail he's able to achieve............. perhaps a little TOO fine!
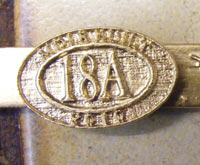
The next stage was to spray with Plasticote brass..........
............. which still allows the detail to show............
............. then finish off with black acrylic, wiped off to reveal the raised brass detail.
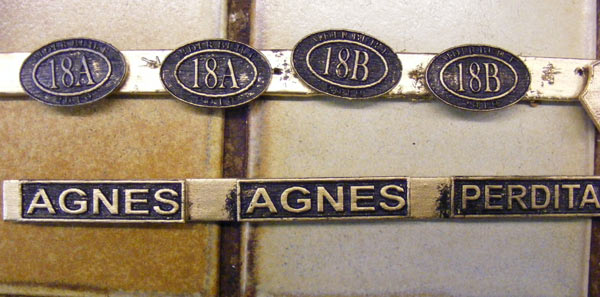
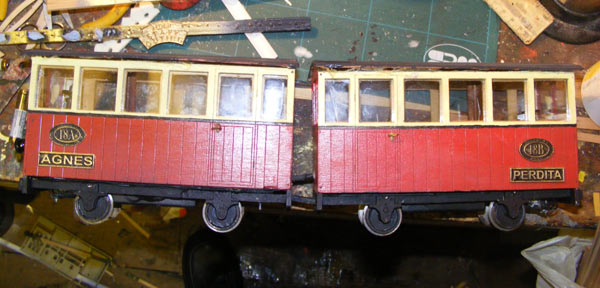
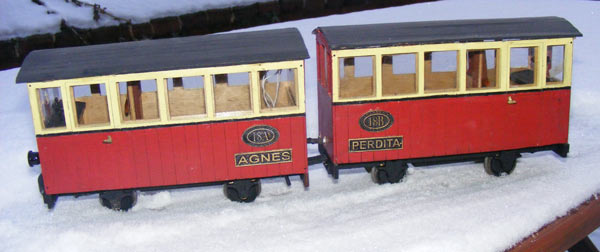
They look nice and bold on the side..........
............. and show up well outside, but of course, the left-hand car is always AGNES.........
............. and the right-hand car's always PERDITA - whichever side you look at! "They think it's all over ............. It is now!!!" (Unfortunately, this was one of the items stolen in 2011, but it is due for replacement with something on the same lines, but different) |


Page Updated on 1st January, 2014
Back to Stock List Home