|
In 2013, standards were promulgated for layout modules - a 1200mm (or 47 1/4") long baseboard built to a fixed standard and designed to be capable of being joined up to any other module to make a ginormous layout which would be different every time it appeared. You can view the specification HERE
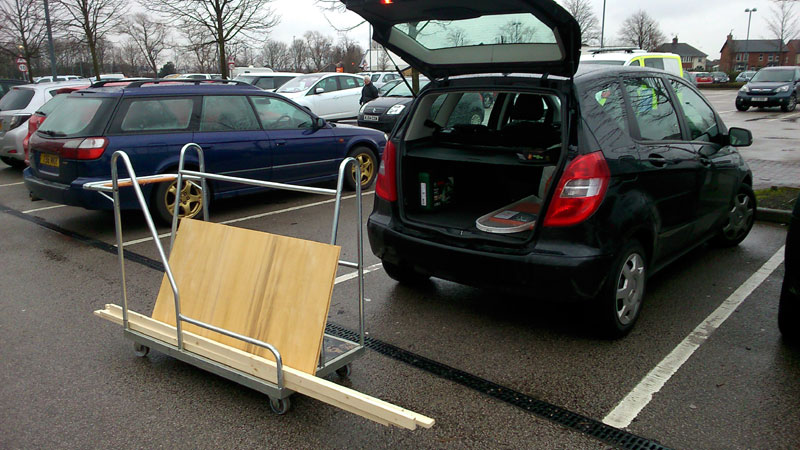
I decided that this was a golden opportunity to put right a wrong which had slightly niggled me for many years. In my mind's eye, Lathkill Dale (for Over Haddon) station on the MDLR should have had a refuge siding at the back of the station platform, for the odd freight wagon, short train needing to be shunted out of the way for another train and to abandon the line's WDLR Class "D" bogie wagons after they were taken out of service (one was literally pulled apart at Conksbury Bridge a little further down the line towards Bakewell, during the "no road traffic" experiment which happened just before the line closed - the experiment which saw the railway handling all freight in and out of the area finished it off as an operating railway as the intensive traffic resulted in a complete breakdown.) However, the layout of the garden didn't allow this and access to the station, instead of being by the steeply-graded road out of the valley (with a 30 mile an hour speed restriction at the very top of the hill - you'd be lucky to do 20 up THAT hill!) was by a set of (imagined) steps. At long last, this is being put right, with a station platform in wood, the old station shelter, bench and sign, and illuminated buffer stop lamp and the road from Over Haddon at the right-hand end of the module as you view it, with Mathatma Coat's auto-rickshaws awaiting passengers needing transport to the village. The first job was to buy some materials (and a new jigsaw, seeing as how the old one (only 4 years old) was having lots and lots of little baby jigsaws, because it was well and truly f***ed.........) A trip to Derby was needed to buy the nuts and bolts which will join my two modules together and be used to attach the ply at both ends which will make the modules easy to carry and store. By the way, the actual location is HERE Construction soon got under way, but one problem has arisen: the plywood I'm using REEKS of something not very nice at all. I first noticed it in the car coming home and it got worse when it was in the garage where I was working. I'm hoping it eventually goes away, but I may have to seal the bottom of the boards (the tops will be covered by scenic materials) so that my modules are "nice to know".
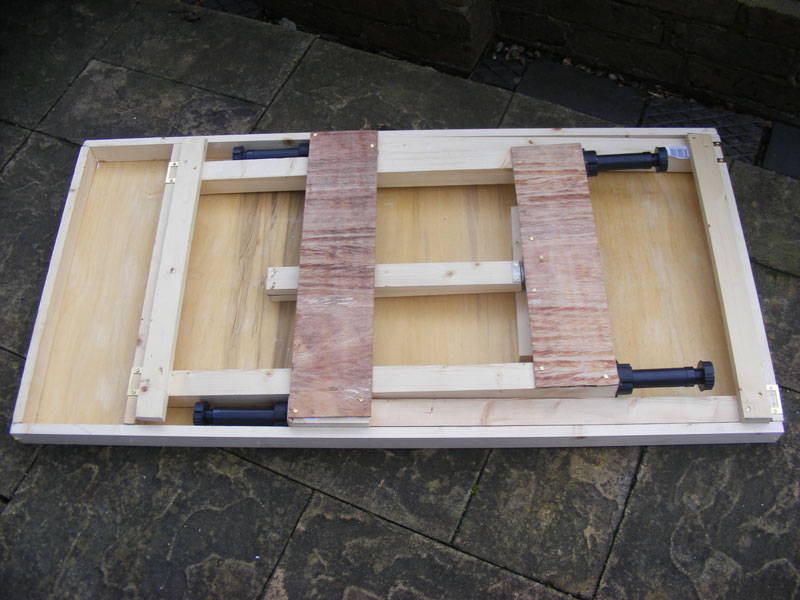
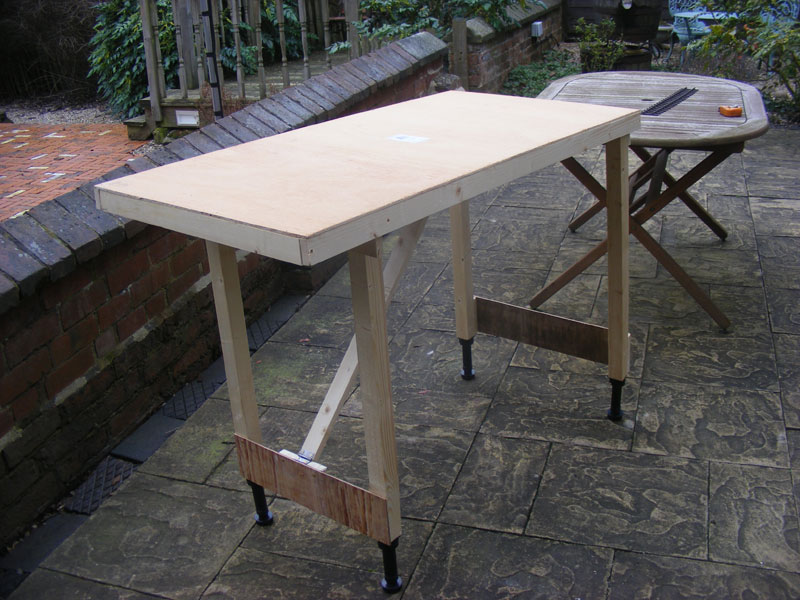
The bottom of each leg needs to be adjustable, so that the layout height can be adjusted to The Standard Height (or whatever height the next-door modules are) so I'm using B & Q kitchen cabinet legs, which (as they're designed to fit to chipboard cabinet carcases) have a spigot with a dowel up the middle to fit them to the cabinets, in addition to the four screw holes. Dealing with this is simple - a few second's work with a Dremel with a diamond disc cutter (other high-speed cutting / grinding /drilling tools ARE available) "modified" the fixing plate to make it flat - you could use a hacksaw followed by a file to get the same result.
Once the legs were built and attached to the right-hand baseboard (and once I'd got them to fold reasonably flat - not easy with the hinged locking bar).....................
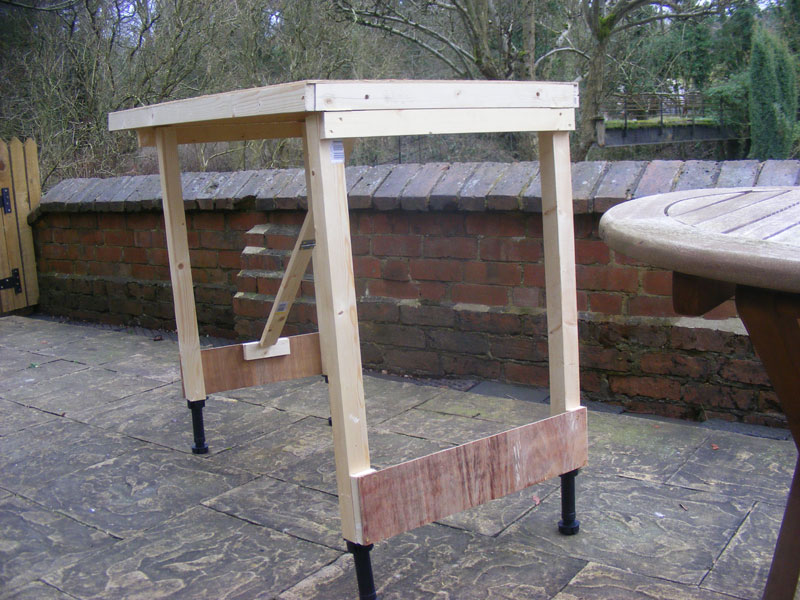
.................. it was stood up outside.
The legs nearest the camera are on the end that joins to the next module - they are required to be inset from the end.
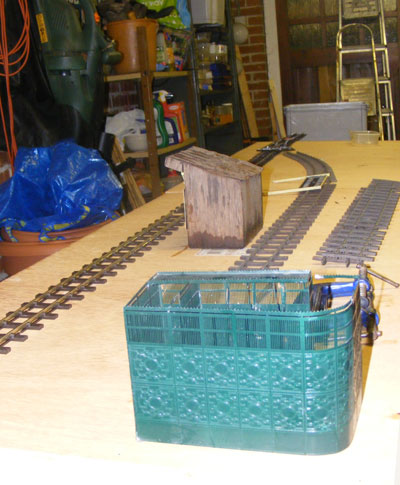
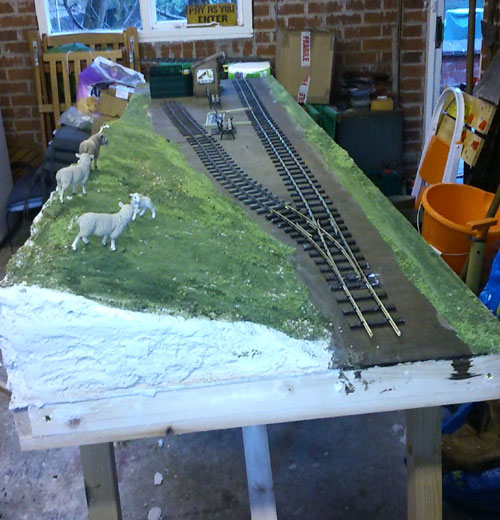
Once the other legs had been completed, the whole was erected for the first time, and a first stab taken at a layout. I've got 3 yards of brand-new Peco SM32 and a small radius turnout for the main line, and four scruffy second-hand lengths of Tenmille (as I later discovered) for the siding - just as it should be.The buildings and signs have been very roughly placed to gain some impression of how it's all going to fit in, but the water tank hadn't been brought in at this point. I am wondering what is going to go at the "turnout end" of the modules - there's a fairly big space there, but I want to introduce a little height and this may well be where I do it.
I must confess to being a little surprised at how far off the floor the modules are going to be, but they'll be easier to work on.
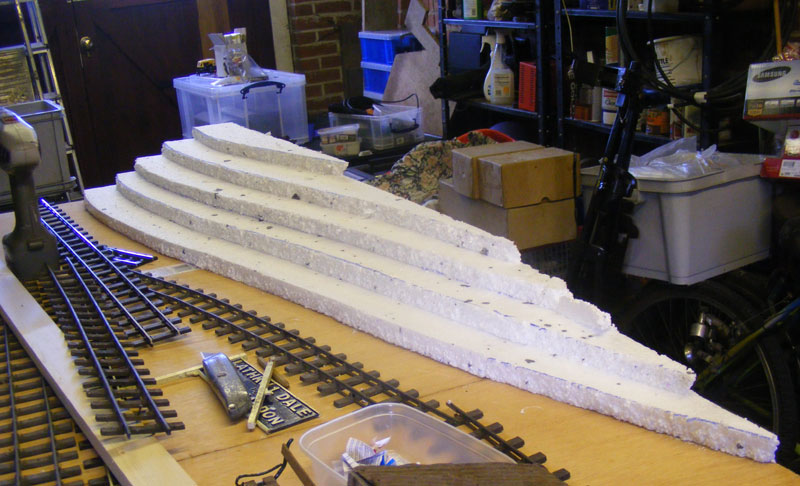
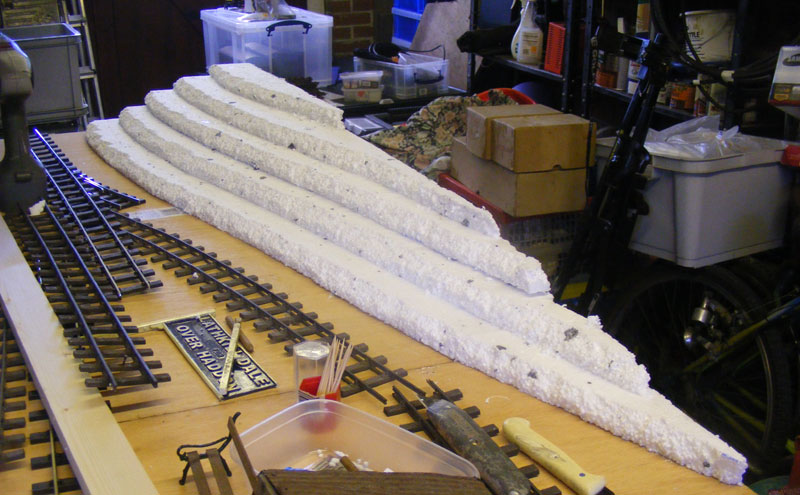
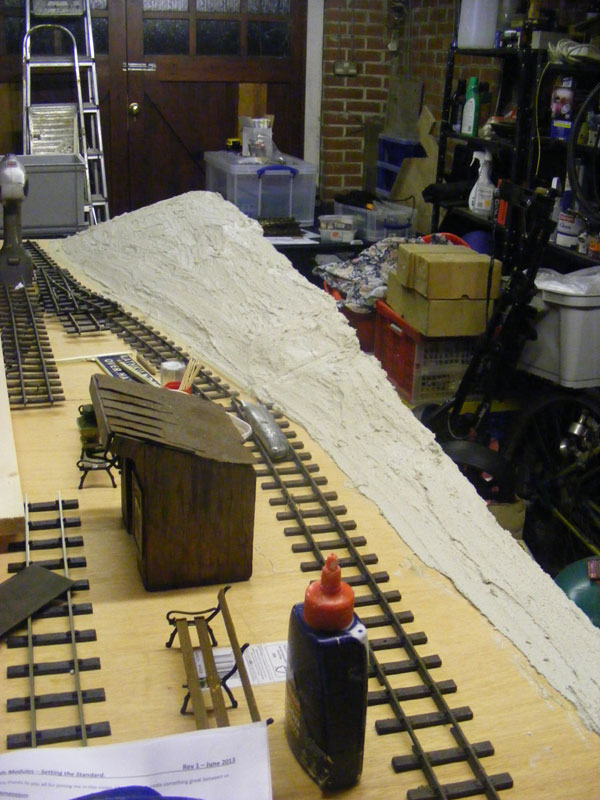
The next stage was to do some scenery at the left hand end of the layout. The technique will be familiar to 4mm scale modellers - expanded polystyrene covered in plaster: what is NOT familiar is the amount of the stuff needed - I actually went out and BOUGHT a sheet to do the job! Fortunately, it only cost £4 + VAT...................
.................. and it was easily carved to shape, both in terms of the original curves and trimming off the sharp edges, which was done when I thought the glue had set. It hadn't, so to hold everything in place I resorted to using wooden cocktail sticks, which go through the sheets like the proverbial hot knife through butter and hold everything in place. One tip: have the vacuum cleaner running with the hose close to where you're cutting - it saves the stuff going everywhere (as it does) when you're trimming it down.
When the PVA eventually went off (after about 2 days) the next stage was to get plastering.................. for which I used a combined filling and finishing plaster from B&Q, mixed in a backet in the kitchen and applied by the Mk I Human Hand, which I find to be better than a trowel. I DID remember to cut the plaster where the two boards are joined together............... Now it's another "sit back and wait" period until the plaster goes off and I can carry on. 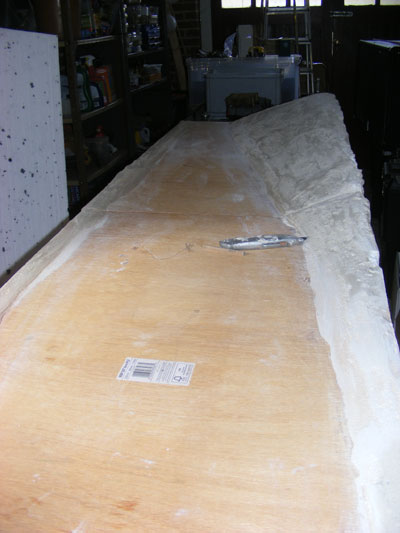
A futher mix of plaster was required, both to fill in and add where I'd gone before, and to put a strip along the front of the modules. 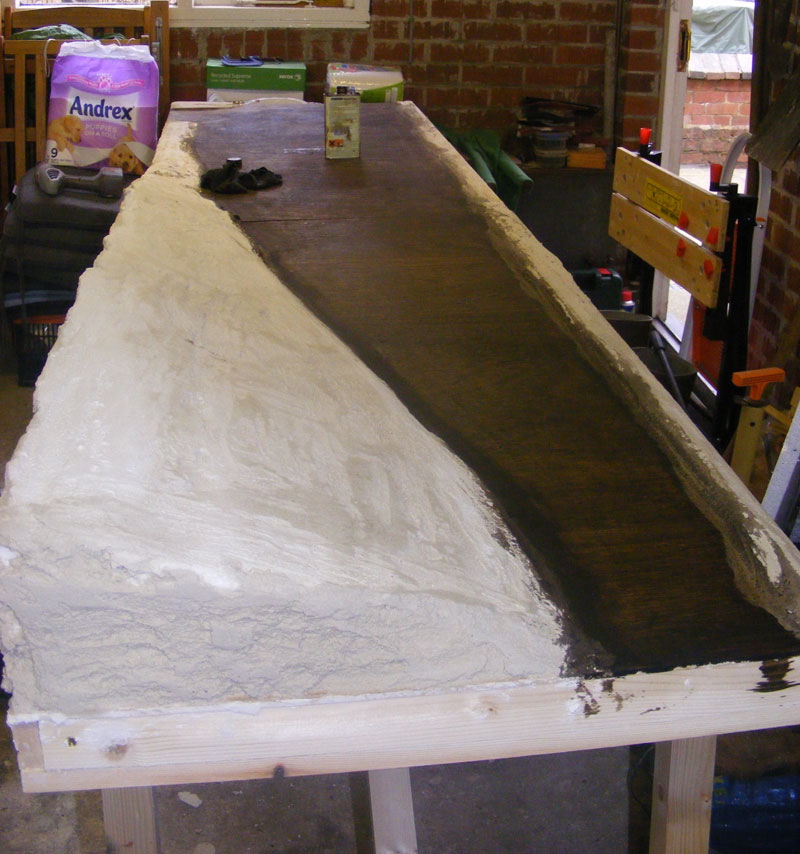
Once THAT was done and it had gone off, a vigorous sanding session (isn't it remarkable coarse paper clogs up in an electric sander?)................ 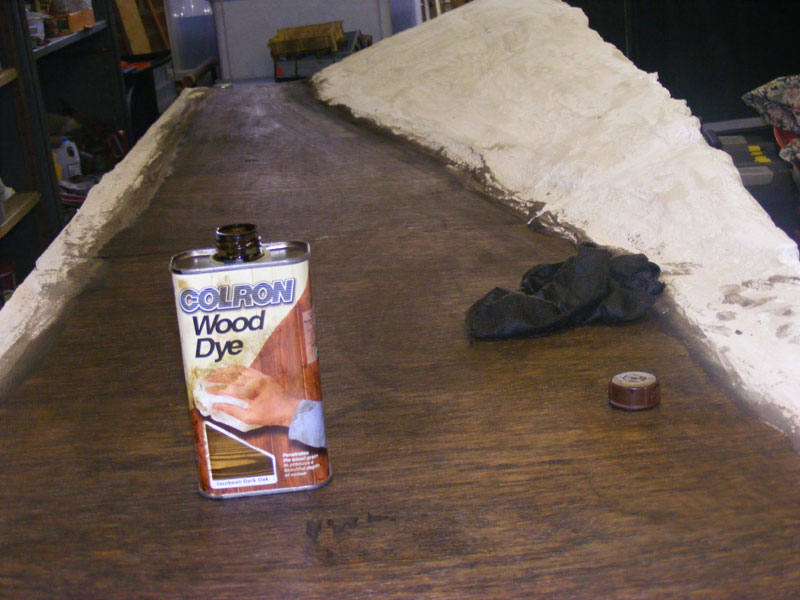
............... was followed by a coat of Dark Oak wood stain on the "trackbed" area, and going up a little way onto the plaster. This means that there shouldn't be any bare wood showing once the job is done.(Incidentally, it was the wood stain that finally killed off The Reek which the modules had suffered from since I brought the plywood home!) 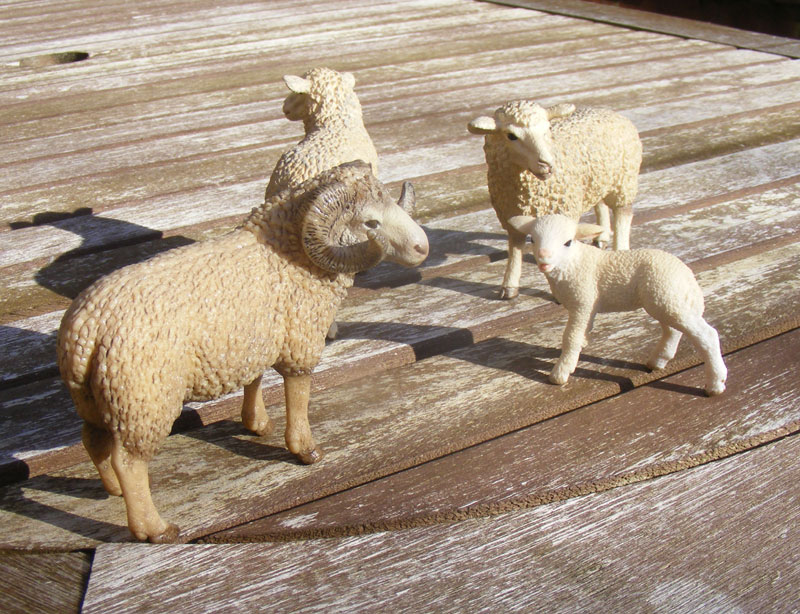
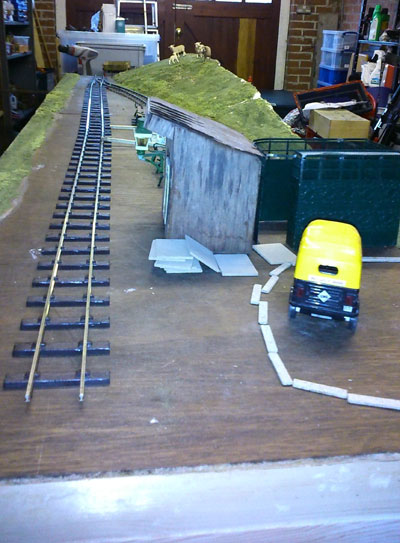
A shopping trip to Nottingham's Early Learning Centre (NOT familiar territory for me these days) allowed me to purchase a small flock of sheep to graze on the hillside 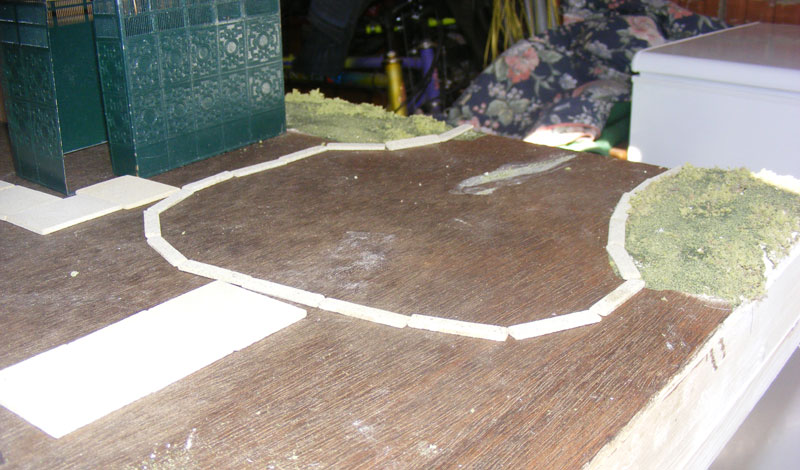
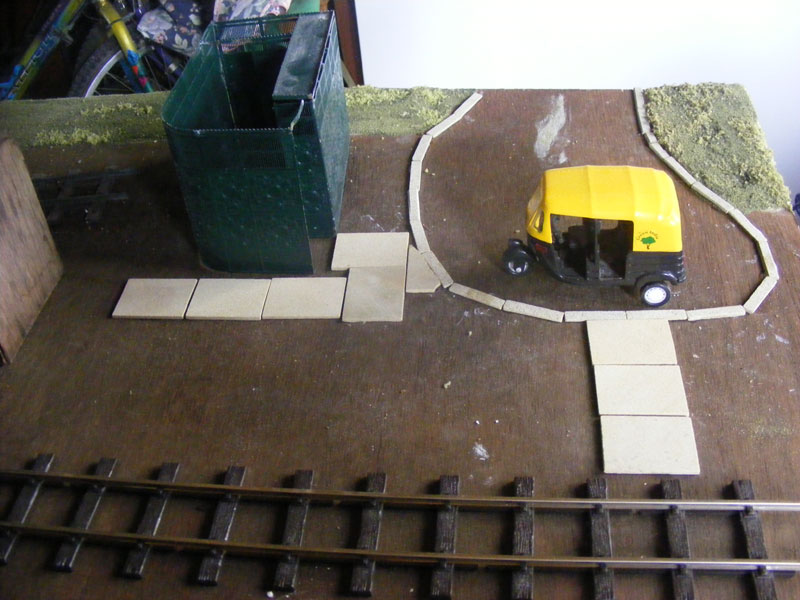
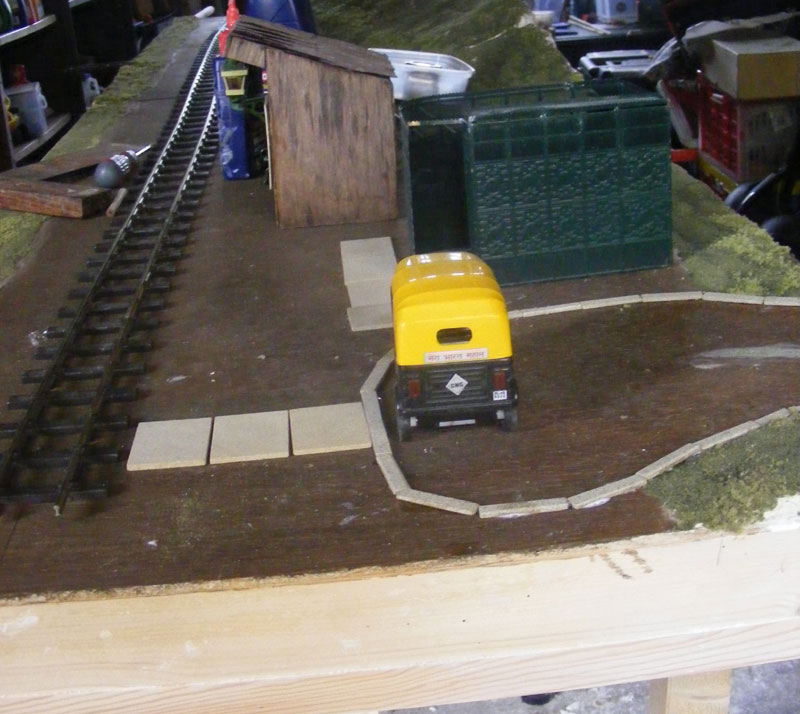
............... whilst the previous day saw the arrival of kerb stones and paving slabs from Richard Stacey. These are Genuine Stone and are shown here where they may well end up.
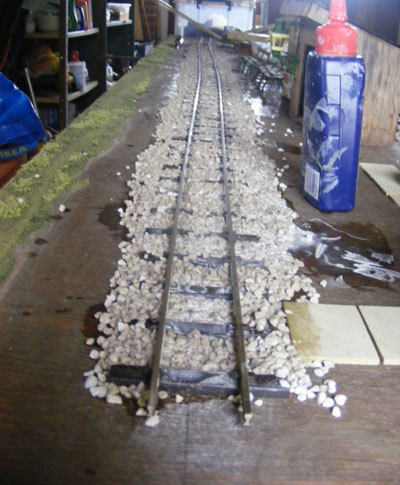
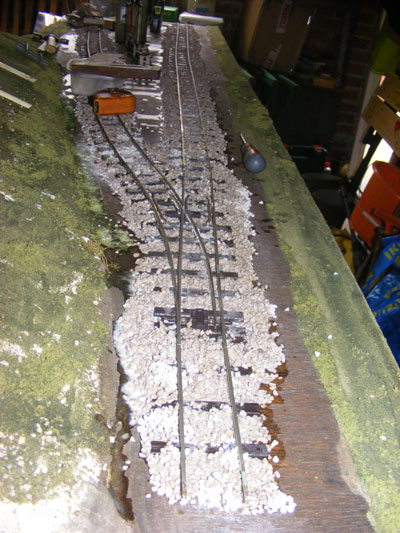
The next stage was track laying.....................
............... where I hit A Little Problem. Laying the main line was fine - Peco track, Peco rail joiners, Peco track pins. When I came to lay the siding, the Little Problem reared its ugly head - this track wasn't Peco flat-bottomed rail track, but Tenmille bull-head rail track, for which I had no rail joiners! A swift panic phone call secured me the small quantity needed, and the siding was duly laid.
Once I'd decided where the roadside kerbstones and paving slabs were going to go.................
............... these were finally stuck in position with PVA. There's quite a lot more scenic work (and a foot crossing) to build, as well as the station platform which is likely to be the next job. 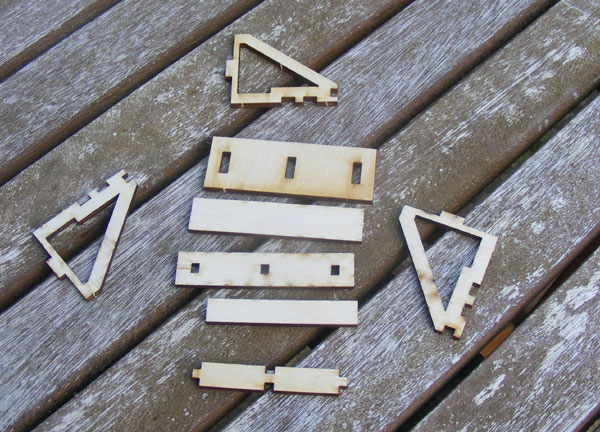
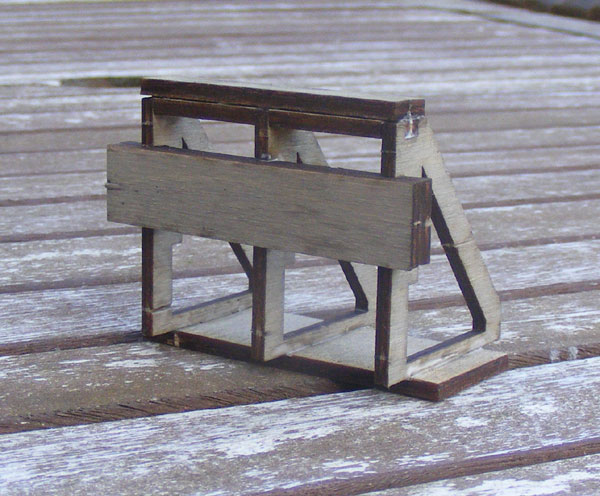
On 29th March, this little kit arrived...............
............... which with 10 minutes' work with dilute Indian ink and PVA, made up into this little buffer stop for the end of the platform siding. The baseplate will sit nicely under the rails and be covered by ballast, and an oil lamp from the "might come in useful one day" box will be added.
Having bought my ballast from Swift Sixteen at the Stafford G Scale Show, this was laid...........................
............... and glued down with the usual 50% PVA / water mix, with a spot of washing-up liquid to assist with wetting. This was applied with (of all things) a Roundhouse boiler-topping-up pump bottle, which was ideal for the job. It took an AGE to dry...................... 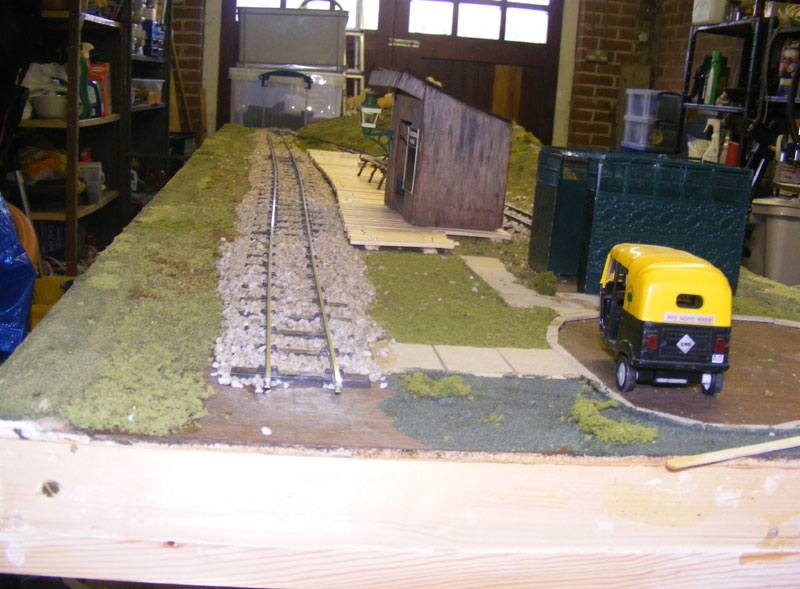
Once it HAD gone off, the weeds and grass were brought up to the ballast...............
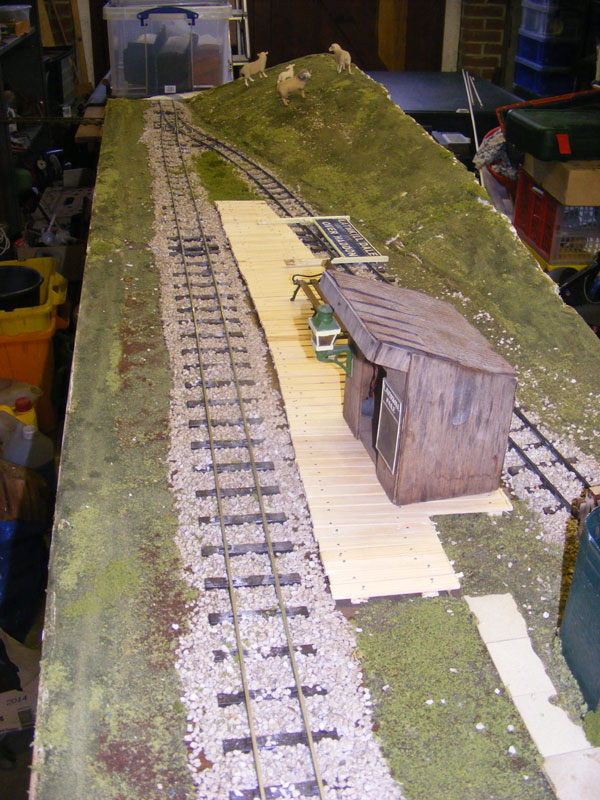
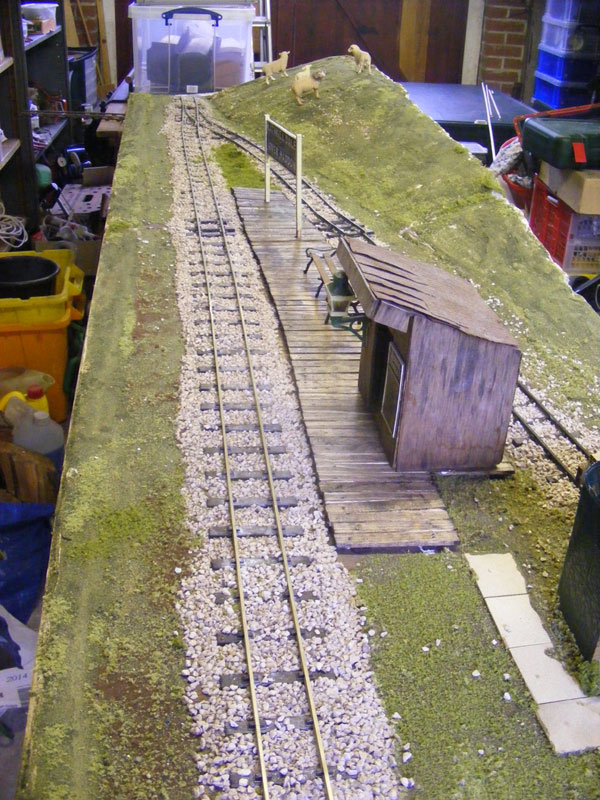
............... and the station platform was built - a rather lower one than I'd normally build, but I needed to get it as close to rail level as possible, to avoid clearance problems. The usual excuse of "Well, MY stock passes it OK" doesn't apply here!
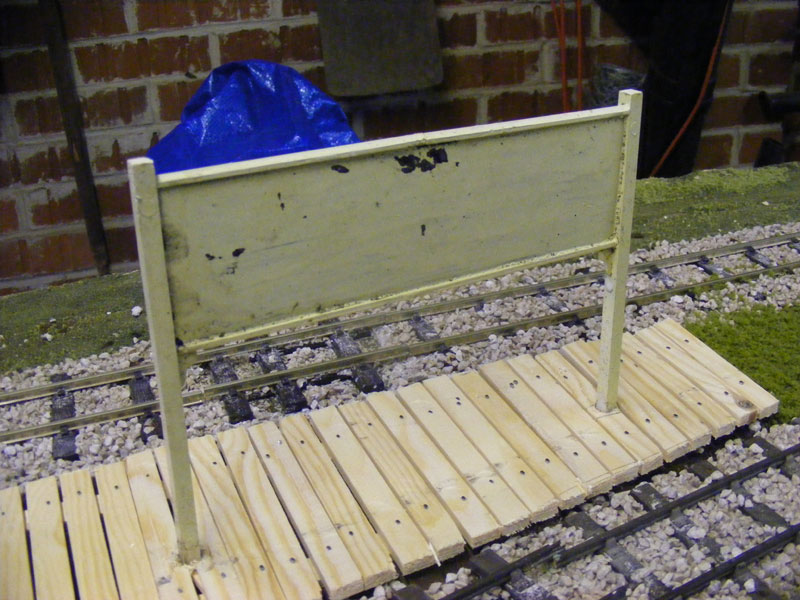
The station sign was recovered from the garden and repaired - the front doen't look too bad...............
............... but the back looks distictly second-hand. The sign actually sits across the baseboard join, and so is one of the few removeable items.
Once the platform had been stained, it looked a WHOLE lot better!
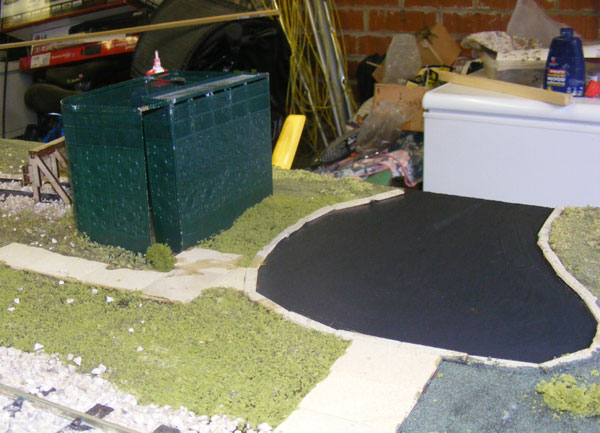
Once the baseboard edges (and the road) had been painted with matt blackboard paint........................
................the final job was to dig out the short joining sections of track and then oh-so-carefully separate the two boards and bolt them face-to-face for transport. |